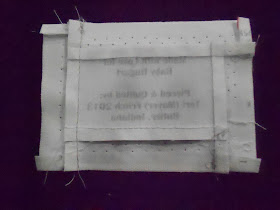
 I promised a little label tutorial today, so here it goes. I print my labels using Microsoft Word and use Printed Treasures fabric. Feel free to use muslin and write on your fabric with any pigma ink pen. My handwriting is awful, so I go with the printed method.
I like to save selvages for various things, but if you don't, cut a few selvages from the fabric that you used on the quilt top or just fabric that matches the quilt. (I recently moved my selvages to this great container. If only I had remembered this before I wasted most of the morning looking for them.)
Pick, Print, or Make a label with the information to your liking. Grab a pile of selvages. I trimmed my selvage 1" from the woven edge. You can make them as narrow or wide as you prefer
 Sew a selvage piece to one edge of your label and press. Now you have a finished edge on your label that won't ravel. I like to use the selvages with the writings and dots on them. Trim selvage piece even with the label.
Now add the second piece of selvage to an adjacent side. Finger press the end of the selvage piece you are adding. Line up the edge with the edge of the previous addition
Sew this piece of the selvage to the label. Trim the non-folded end even with the label
Add the next piece the same way.
I like to pin the final piece in place with the edge rolled down and lined up. I trim the selvage piece 1/4" beyond the selvage that is already sewn on
Pin both ends of the last selvage piece to be added.
Now you have a completed label with all finished edges
The back of the label will look like this.
Now grab your favorite hand sewing supplies and get busy.
You can either pin your label in place, or my favorite is the soluble 2 sided tape.


OK... using the selvage is brilliant! I'm going to have to start keeping mine now.
ReplyDelete