Pages

Monday, December 30, 2013

Quilter ADD

With the end of the year quickly approaching, one would think I could stay focused and achieve a few more completions.  Yesterday my friend Tina came over for a little socialization.  I bounced from project to project and made lots of messes in my studio.  It is hard to explain how it can feel so fulfilling to just sit in my studio and piddle (is that even a word).

Remember this tree skirt.  I do not recall the pattern, but something went terribly wrong with color placement (or choices).  My hubby said it was because I didn't like the fabric any longer.  I came to the decision yesterday that I was putting the up for adoption.  I don't want to waste any more time on it.  It will become my first finish of 2014!

While Tina was here, I was thinking about a tree skirt pattern that I have been wanting to try.  It is on the insert that comes with the 10 degree wedge ruler.  I pulled the fabric, cut them and started to sew.  I was able to get the tree skirt together in one afternoon and evening.  It is 2 of the same fabrics that were in the original tree skirt.  By removing the red, somehow it all looks better.  There is red in the pear fabric, but I don't think it was enough blend with the large amount of red on my first attempt.


As always my 2 favorite models were ready for a photo opportunity.  I barely snapped the first picture before they joined me.

This will be gifted to someone for next year's Christmas.  The pattern was easy to make and I am pleased with how it turned out.


Thursday, December 26, 2013

World's Record (or at least my personal record)

I just realized that my last fabric purchase was on October 4th when I hit a fat quarter sale.  You remember the one...I was supposed to be getting groceries.  At least that is the story I told my family.  It is really too bad that I had a senior moment in all the fabric excitement and forgot to actually go to the grocery.  There was no way to disguise my fabric purchase when I returned without any grocery sacks.

This must be my longest "no buy" spree (quite by accident).  As you may recall, the last time I "fasted" from fabric purchases it was not good.

12 Weeks tomorrow and counting!

I hope you had a fabulous holiday season.

Wednesday, December 25, 2013

Year End Re-Cap

It been a really long time since I have found the time to blog.  When I looked back at my last post, it was hard to believe it was November since my last post.

I forgot to post about my October accomplishments.

  1. I sewed my bright/black log cabin together.  I am still deciding if it need borders.
  2. I sewed my bright 4 patch quilt together and it is waiting to be quilting
  3. I worked on my really old scrappy 4-patch quilt and I have the rows sewn together.
  4. I made the 4th block to my swoon quilt.
My word this year is FINISH.  I had 24 finished from my UFO Parade, and I made progress on lots more projects from the list.  It was fun to check them off and get them closer to completion.  I do have a few items that were started in 2014 that I didn't finish.

Have you picked a word for 2014?  I am still trying to decide.  

Have you thought about your goals for 2014?

Wednesday, November 13, 2013

Sort and pet

It seems like forever since I have been able to hang out in my studio.  I am thankful today for a sort and pet day.  I picked out a pattern in the new Quilty magazine that is calling me.  I am starting to sort and cut so I will be ready for Christmas vacation.

Tuesday, October 15, 2013

Tree skirt

I never blogged about my daughter's finished tree skirt (or the wedding).  I finished the tree skirt binding just in time. The sad part of this story is that I only have one photo of the finished project. 

Even more sadly, this is the only picture taken of me and my DH.   It was snapped by my son before the wedding with my phone.  My dress was originally strapless.  I purchased some fabric and made the straps (special thanks to my garment sewing friends)
My hubby doesn't get dressed up too often, so it is a shame we don't have more pictures.


Monday, October 14, 2013

Which Border

I eliminated some of the prints from the last post and went looking through my stash for more border options.  I also started looking for the perfect backing (since that seems to be a tough decision for me).

What do you think of these border options?  I am certain of the red for the first border, but I am leaning toward one of the green prints on the left for the second border.  Leave me a comment and let me know which one is your favorite.

This pattern is from McCall's Quilting November/December 2011.  I think it would also make a great tree skirt.


Stop over to Judy L's to see what others are working on this week.

3 more sleeps and I will be off to a quilting retreat with around 80 other quilters.  I have my projects picked and packed.  I tried not to pack too much this time.  I am always afraid that I will run out of projects to work on, but this time I tried to be conservative.


Sunday, October 13, 2013

Class sample


The old "unfinisher" me would have stuffed these pieces into a box.  I am determined not to continue down that path.  This pattern went together very quickly.  It is a little tricky on which way to cut the half squares.  Just remember the secondary colors  go the opposite of the primary colors.

When you are adding the sashing strips to the half squares, press them in half to find the middle.  Align the middles then pin together.  When you square these up, it is the small triangle that get trimmed down.

Sew the 4 quarters together.  Since everything is squared up, they should line up well.

Add the last 3 sashing strips.
Now for borders.  Decisions, decisions.....  Which outer border do you like?


Monday, October 7, 2013

Design wall (floor) Monday

I decided to move forward with my tree skirt.  I don't have the pattern any longer, but I am quite certain I don't have my colors in the correct spot.  This seemed like the best option with the pieces I had. 

I have also been working on a container of stocking pieces from about 10 years ago.  These were already partially done, so I am completing them.  I like the colors still, but I have a much better understanding of scrappy now.  
I have 9 stockings in the stack. 

I am still organizing and packing for the upcoming retreat.  I am so excited!!

Check with July L to see what everyone else is showing off this week.


Sunday, October 6, 2013

Any ideas?

I don't think I have the layout quite right.
I pulled out this UFO to see I I could figure the pattern out.  I know it was in a magazine, but I don't have any idea which one.  I am sure I had a plan, but I don't remember.  Looking for any ideas on the layout.

Friday, October 4, 2013

Therapy


It truly was therapy shopping at the  fat quarter sale.  On the way there I decided I didn't really need anything so I was going to limit myself to 20.  Well I found 20 in the first bin.  So I just threw caution to the wind

I guess fabric is therapy for more than just me.

Wednesday, October 2, 2013

Transitioning to October Goals

I completely missed the month of September.  I did not set any goals and I rarely turned on the sewing machine.  As football, soccer, baseball and the play finish up for my kids this month I will ease back into my sewing.

I am gathering up some of my UFOs to finish at the October retreat in Shipshe sponsored by Ruth.  It is a great retreat.

I need to be careful that I don't bring ANY UFOs from a previous retreat there!  How embarrassing would that be to admit that another year has gone by and the project still isn't finished.

These are the things I am planning on taking to the Retreat

  1. Bright/Black Log Cabin
  2. Bright 4 patch quilt that I was working on here
  3. This scrappy 4 patch quilt that has been hanging around for a lot of years.
  4. My stockings that I started 15 years ago for my family
  5. The last block to my swoon quilt
  6. A new project (NewFO)
Since I will be piecing mostly this month, I doubt that I will have any finishes.  


Tuesday, October 1, 2013

Retreating


I was asked if I quit blogging.  Well, I haven't, but I haven't been doing any sewing.  It was great to have some sewing time with friends this weekend. I worked on several things, but none of them were from the UFO parade.

I finished my braided runner flimsy that I used to demonstrate at class.  I think it looks very Irish (ND) if you ask me.
I put together this tree skirt for a wedding gift next month.  I am pleased that I was able to use the blue snowman scraps, and I had the border fabrics in my resource center.
I pieced this pillow top from scraps that my good friend Dottie gifted me.  
I made 2 more swoon blocks in an attempt to make my quilt not so pink,
I worked a little bit on this jelly roll pattern that I plan to do a little demonstration on.

I guess I didn't take a photo of the other quilt top I put together, so I will save that for another blog post.

I have never posted from my phone before.  I hope it goes well


Friday, August 2, 2013

School Begins

All my kids were up nice an early today.  They were eager to go back to school.  I don't know how long this will last, but I am going to enjoy it while I can.


I have already started working hard on my August goals.  I ran into a few problems.  Do you see anything unusual about this design?

 I guess I still haven't learned that symmetrical designs such as a log cabin need an even number of rows and columns.  I triple counted the blocks.  I had 56 blocks - yep, I planned to do a 7 X 8 block setting.  I had my little tantrum, then I got busy and cut out 8 more blocks.  The good news is I had plenty of scraps just waiting to be made into the 8 additional blocks.  They are almost completed then I will be ready to start my first August goal.   I love how the different shades of black play with each other.

 I started working on my second goal for August at the sew day last Sunday.  I have the quilt sew into 16 block sections.  This is my go to pattern for leftover bits of jelly roll strips.  This type of design needs an ODD number of rows and columns.  I like to start and end the rows the same (either horizontal or vertical).
I laid out my sections of blocks to see how they looked.  I like how the quilt looks, but I think perhaps I should make it a little larger to fit a twin bed.  As it it, it will be a large lap quilt.

Monday, July 29, 2013

Last July Finish

I know technically, this really isn't finished, but lets not get technical.  I had several other July finishes here.

This is one of my oldest UFOs.  It was the very first scrap quilt I ever started.  For those that haven't tried scrappy, the first one is the hardest.  I had a really hard time putting these colors together.  In the beginning I was trying to match the colors in each block.  I did a lot of complaining and doubting along the way.


Now that I understand value a little better (keep in mind I started this about 10 years ago), I would have done better on my red selection. I am pleased to have this one quilted an ready to bind.  It is a pattern from Love of Quilting magazine.

These are my August Goals.

August Goals

I have already exceeded my goal for finishes this year. August will be an adjustment month for both my family and myself since we will be easing back into the school schedule.  I hope to have just finishes for August.  As I look through my picture parade of unfinished projects, I notice lots of completions.  I did not find a lot of projects that were exciting me for this month.  I hope this won't end my desire to finish things.

  1. Quilt my bright Christmas Star quilt

  2. Quilt something for fall
  3. Sew the blocks together for my bright scrap quilt
  4. Sew the blocks together for my bright log cabin

Friday, July 26, 2013

Feeling Lost

I am feeling a little lost, like I should be camping at the ball park tonight.  I have come to my senses.  I am giddy with excitement!  I remembered we are having a sew-in on Sunday.  Very few things are better than a day away with friends!  Now for the hard part - what should I bring to sew?

Have a great weekend.

Thursday, July 25, 2013

Food for Thought today - Jelly Roll vs. Layer Cake

Did you ever think about how much fabric was in a Jelly Roll vs. a Layer Cake?  Which one give you more fabric?  They are exactly the same!

2 1/2" X 40" X 40 pieces = 4,000 Square Inches

10" x 10" x 40 pieces = 4,000 Square Inches

In terms of body shape, I wish I was more like a jelly roll (long and skinny), but in reality, I am more layer cake shaped

Since they are the same amount of fabric, It is best to evaluate the pattern you want to use and determine which will give you the least amount of scrap.


Wednesday, July 24, 2013

July Progress

I working away on my July list.  I am working hard to get 1/3 of my list done by the end of the year.  Just one more week until school starts.  I think the kids are ready to go.

This first runner was a class sample a few years ago.  It was very loosely based on a quilt from American Patchwork & Quilting.  It is all trimmed and ready for binding.


 This is the same pattern with different colors.  Since these were small projects, I tried some new to me quilting designs.  I tried to just relax and have some fun with them.
This was a simple stripe table runner.  I quilted  a simple stipple on the blue and red quilt, and I quilted the nutcracker runner a little more detail

This runner sat forever because I was puzzled how to quilt it.
 I selected a swirling design in the neutrals and a loopy designer in the darker colors.  This is a Bonnie Hunter pattern from her book Scraps and Shirttails.

 I am excited to mark off these 5 UFOs.  Yes, I know there isn't binding on them, but it is close enough for me.

Chevron Quilt Photo Session

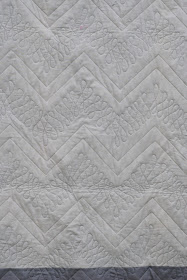
I wanted to share some photos of my chevron quilt with the binding on.  I had perfect weather to take the photos.  I love the contrast of the garden behind the quilt.  I went a little heavy on the photos.


This quilt is on its way to Colorado in time for the new addition to the family.  This was a new start for 2013, but the good news is that I finished it in the same year.

Finishes from 2012

I just remembered to update my finishes page tab on the right side of my blog.  I was extremely excited to go through my UFO parade and look at all the quilts that have been completed.  I am up to 22 finishes!!  My goal for the year was 20 finishes from the list.  I have finished 1/4 of my UFOs in the first 7 months of the year.  I still have a long way to go, but this is encouraging.  I hope to have 1/3 of my UFOs done by the end of the year.  

At this rate....It will only take me 3 years to get caught up.   Come to think of it, that seems like a long time.  

Saturday, July 20, 2013

Label Tutorial

I promised a little label tutorial today, so here it goes.  I print my labels using Microsoft Word and use Printed Treasures fabric.  Feel free to use muslin and write on your fabric with any pigma ink pen.  My handwriting is awful, so I go with the printed method.

I like to save selvages for various things, but if you don't, cut a few selvages from the fabric that you used on the quilt top or just fabric that matches the quilt.  (I recently moved my selvages to this great container.  If only I had remembered this before I wasted most of the morning looking for them.)
Pick, Print, or Make a label with the information to your liking.  Grab a pile of selvages.  I trimmed my selvage 1" from the woven edge.  You can make them as narrow or wide as you prefer


Sew a selvage piece to one edge of your label and press.  Now you have a finished edge on your label that won't ravel.  I like to use the selvages with the writings and dots on them.  Trim selvage piece even with the label.


Now add the second piece of selvage to an adjacent side.  Finger press the end of the selvage piece you are adding.  Line up the edge with the edge of the previous addition

Sew this piece of the selvage to the label.  Trim the non-folded end even with the label


Add the next piece the same way.
 I like to pin the final piece in place with the edge rolled down and lined up.  I trim the selvage piece 1/4" beyond the selvage that is already sewn on
 Pin both ends of the last selvage piece to be added.


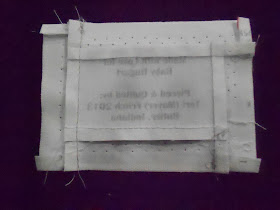
Now you have a completed label with all finished edges

 The back of the label will look like this.


Now grab your favorite hand sewing supplies and get busy.


You can either pin your label in place, or my favorite is the soluble 2 sided tape.