Tuesday, January 31, 2012
Design Wall Monday
Actually I know it is Tuesday, but I just couldn't find the time to get this posted yesterday. 4 little ones under 18 months kept me occupied.
These are all my bright FW blocks. I think they don't look nearly as yellow as before. I still have plenty of time to even out the colors.
This is a pattern from the book Simplify by Camille Roskelley. I fell in love with the quilt when I first saw it. Most of the fabrics are from a scrap bag purchased from Moda. It is the Fandango line by Kate Spain. I used the whole scrap bag. I filled in with several fabrics from my resource center to give it even more variety. I just love the yellow fabric with the tags on it that Ellen gifted me. I don't plan to add any borders (at least that is currently the plan). I want to hang it on a wall in my dining room to hopefully cut down on the noise vibratations of my children. It was a very fun pattern to sew, but not one that I could take and go. Once I had the blocks arranged like I wanted, I knew I had to get it sewn together.
Let's keep the excitement going!
Have you completed the January blocks yet? For the overachievers, I wanted to go ahead and post the next 3 blocks with cutting instructions. I am sewing these together differently than in the book, but you are welcome to follow the example of the Farmer's Wife book.
#84 Spool
Join the light square with 2 dark squares trim off the angles on the dark 6 1/2" pieces and add the triangles. Join the 3 pieces to complete the block.

- #84 Spool
- #81 Snowball
- #41 Friendship Star
#84 Spool
- 2 - lights 2 1/2" x 6 1/2"
- 1 - dark 2 1/2" x 6 1/2"
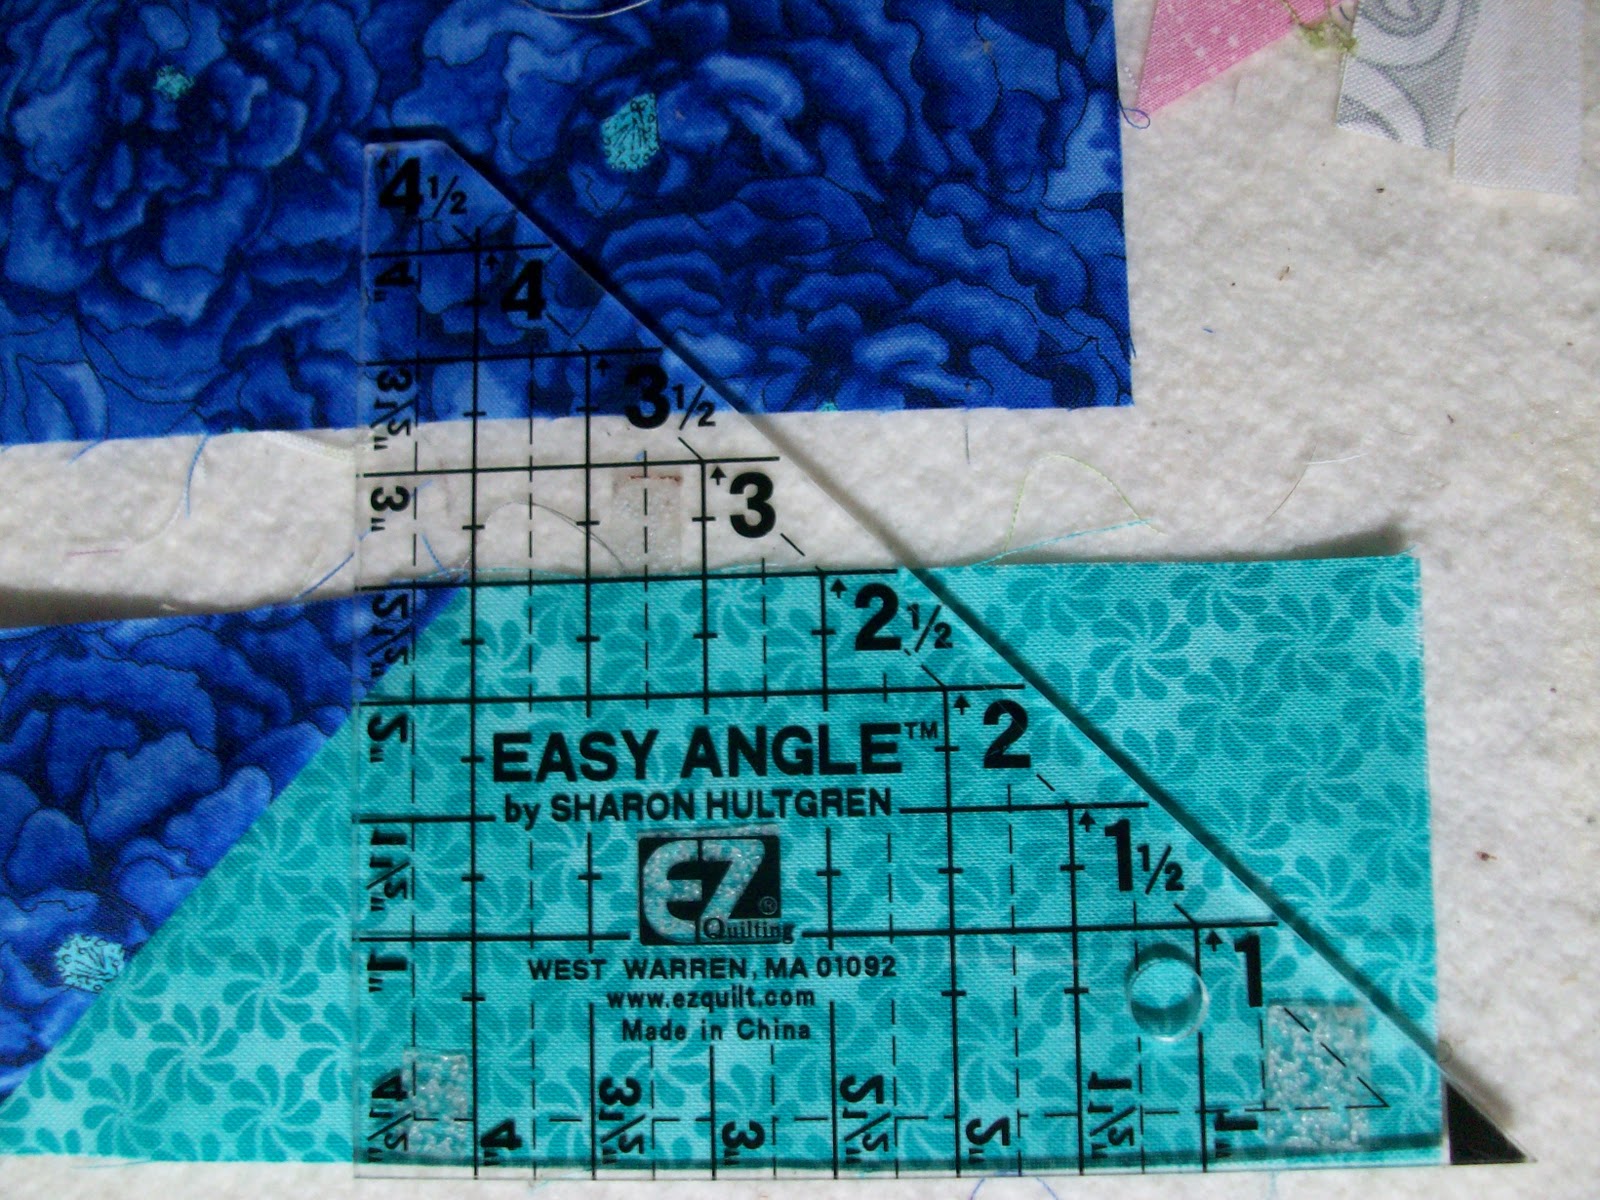
- EITHER 4 - 2 1/2" squares OR 4 triangles cut with the Easy Angle using a 2 1/2" strip width (before you decide, you may want to see the method below)
Join the pieces with the triangles to the Dark rectangle to complete the spool block. Check your measurements to make sure it is 6 1/2".
Snowball # 81 is pieced the same way.
- 2 dark 2 1/2" X 6 1/2" rectangles
- 4 light triangles cut with the Easy Angle 2 1/2" strip (can use square method if you prefer)
- 1 light 2 1/2" square and 2 dark 2 1/2" squares
#41 Friendship Star
- 4 Light 2 1/2" squares
- 4 light triangles cut with Easy Angle 2 1/2" strip
- 2 dark triangles cut with the Easy Angle 2 1/2" strip
- 1 dark strip 2 1/2" X 6 1/2"
Thursday, January 26, 2012
More Farming
- 4 light 1 1/2" x 2 1/2"
- 4 dark 1 1/2" x 2 1/2"
- 5 dark 2 1/2" squares
- 8 light 1 1/2" squares
Take care to get the angles going the correct way!!
If you need a closer look, you can always click on the picture to make it larger
- 4- 3 1/2" squares
- 4- 2 " squares
Place the squares on the inside corner of all the squares and chalk a line on the diagonal. Sew on the line and trim away the excess.
I trimmed away both the background and the excess of the square fabric 1/4" from the stitch line. I pressed the dark squares toward the larger square, and the light squares toward the small square. This helped them to match up when sewing the 4 patch together.
Remember PINS ARE YOUR FRIENDS. These pieces are only going to get smaller. Pinning will help things match up nicely.
I have the first 8 blocks sewn, and they all measure 6 1/2". It is wise to measure after each addition of fabric to make sure you have the correct seam allowance. I really chose a lot of yellow in the first 8. Good thing I have over 100 more to even things out.
These are my colors for the quilt (thank you Nancy and Char) I am picking my colors from the bucket. I think this will give me plenty of variety. Since I am making this quilt in two colorways, I am planning on making baby quilts with the brights (20 blocks each).
Grab your Farmer's Wife book and get sewing!
Sunday, January 22, 2012
Farmer's Wife has begun!!
Let's start off easy in the month of January with the following block numbers:
#29 Economy
The first picture shows the difference in the markings between 2 rulers. The ruler on the right is the Olfa Frosted and the markings are the FINISHED SIZE; the ruler on the left is the Easy Angle, and the markings are the UNFINISHED SIZE. I just want you to be aware of the difference.
I like to trim off the second dog ear like shown in this picture. It helps to line things up when joining pieces.
Start by adding opposite triangles to the center square. It helps if you crease the center square and line up the point of the triangle with the crease. After the first round of triangles are added, the square should measure 4 3/4".
Add the remaining 4 triangles to yield a square measuring 6 1/2"
54 Kitchen Woodbox

Use the picture at right as a guide to lay out the pieces for this block. Join the 1 1/2" x 2 1/2" strips to opposing sides of the block; continue by adding the 1 1/2" x 4 1/2" pieces of the same color. Measure your block to make sure it is a 4 1/2" square! Adjust your seam allowance if necessary.
Next add the remaining 1 1/2" by 4 1/2" pieces to the block
Center the 1 1/2" by 5 1/2" pieces and join to the unit
Place your easy angle ruler on the joined pieces lining up the angle of the ruler 1/4" from the corner. Line up the lines on the ruler with the top and side to make sure you are trimming the unit on the correct angle. Trim all four corners.
- 2 Autumn Tints
- 4 Basket Weave
- 10 Bowtie
- 29 Economy
- 48 Homeward Bound
- 54 Kitchen Woodbox
- 55 Linoleum
- 73 Rainbow Flowers
#29 Economy
- 1 square 3 1/2" square
- 4 triangles cut with Easy Angle with a strip width of 2 5/8"
- 4 triangles cut with easy angle strip with 3 1/2"
I like to trim off the second dog ear like shown in this picture. It helps to line things up when joining pieces.
Start by adding opposite triangles to the center square. It helps if you crease the center square and line up the point of the triangle with the crease. After the first round of triangles are added, the square should measure 4 3/4".
Add the remaining 4 triangles to yield a square measuring 6 1/2"
54 Kitchen Woodbox
- 1 square 2 1/2"
- 4 triangles cut from a 2 1/2" strip with the easy angle
- 2 pieces 1 1/2" X 2 1/2"; 2 pieces 1 1/2" X 4 1/2"
- 2 pieces 1 1/2" X 4 1/2"; 2 pieces 1 1/2" X 5 1/2"
Use the picture at right as a guide to lay out the pieces for this block. Join the 1 1/2" x 2 1/2" strips to opposing sides of the block; continue by adding the 1 1/2" x 4 1/2" pieces of the same color. Measure your block to make sure it is a 4 1/2" square! Adjust your seam allowance if necessary.
Center the 1 1/2" by 5 1/2" pieces and join to the unit
Place your easy angle ruler on the joined pieces lining up the angle of the ruler 1/4" from the corner. Line up the lines on the ruler with the top and side to make sure you are trimming the unit on the correct angle. Trim all four corners.
Hopefully this will help you with any questions you may have had for the first blocks. If you need a tutorial on any of the other blocks listed, let me know. If you click on any of the pictures, it should make them larger so you can see better.
Saturday, December 3, 2011
Gingerbread Fun
Our local library was handing out gingerbread houses to be decorated and judged. My kids jumped right on it because there were great prizes. I stayed out of the way (besides helping them locate additional supplies). One of the rules was that all the pieces in the kit must be used. This turned out to be a tricky requirement. I was amazed at their creative ideas and how well they were able to execute them. Delaney decided on a beach theme for her house. She was able to transform the peppermints into coconuts and bikini tops. I think she did a fabulous job.

Sydney waivered on what she wanted to do, but then settled on a train theme. She was going more toward Polar Express. She put a lot of time into making the train cars and the tracks. She had to cut out all the little dots and squares the covered the cars. I thought it was a great idea to use the peppermints at wheels.
And the snow became the smokestack.
Gavin went to town decorating his house, and he settled on a sweet theme. I just love how the ice cream cone turned out. At the last minute he came up with the idea of putting the gingerbread man in the cocoa pond. I was really impressed by this idea.
After the kids were all putting so much time and effort into their houses, I decided I better do one. I spent the first the first week debating on how I wanted to decorate mine. Anyone that knows me knows that I do better with a deadline. The first idea I came up with was straws for the roof. After that, the creativity started flowing. Long ago quilt group did a swap with 1000 pyramids. I did all the cutting with my Accucut. In the center of the die was this beautiful little hexagon that was essentially a little piece of everyone in my quilt group. How could I throw away these beauties? What on Earth would I ever do with 10,000 or so of these? They have been aging in a container in my sewing room for over a year. I devised a plan! I was going to have a house with a cobblestone path. The next thought was to have one side of the house be stone. My girls quickly squashed this idea and said the whole house needed to be covered. The fabric for the base was a piece of leftover backing. The tree is made from a scrap of fabric gifted to me and I added light brite pegs for lights. It was a very fun project but I spent way too much time on it when I should have been doing other things. It was quite time consuming to line up all the little hexagons perfectly. I learned a few things about myself along the way.
Eleanor do you see anything special about this window?? There is that dreaded piece of fabric that started your title as cheetah girl!!! It just fell out of the container and asked to be put on the house. I picked a special spot under the window.
And the snow became the smokestack.
I had lots of pieces that I had to use. I didn't want windows in my house, so I used these pieces as the gate. I didn't want to pay the price for modge podge, so I used equal parts of Elmer's glue and water. I applied with a brush and put several coats over the fabrics. I selected several selvages from my basket and cut just the dot portions. I sewed them together to make the garland. The gingerbread man was cut with my Sizzix, but the rest of the foam pieces came in my kit.
Eleanor do you see anything special about this window?? There is that dreaded piece of fabric that started your title as cheetah girl!!! It just fell out of the container and asked to be put on the house. I picked a special spot under the window.
Monday, November 14, 2011
Another Oldie
Many years ago when my group was making charity quilts, a challenge was issued to make a second quilt from the scraps of the first quilt. I did start it, but the flame burned out. I am in the mood to finish it up, but I need your help. This quilt is U-G-LY. It needs a lot of help. It is those big squares in the middle. Obviously I didn't quite have the log cabin concept at the time. Please help me find a way to salvage these 12 blocks before I decide to trash them. These are some of the ideas I came up with.
- Slash the blocks into 4 equal pieces vertically and horizontally; rotate 2 of the blocks 90 degrees and sew them back together
- cut them into wonky 4 patches and add a narrow black sash (perhaps 9 patches or just vertically?)
- cut them on the diagonals and sew them back together so the stripe forms a square (problem with this one is that not all the stripes are going the same direction).
Thursday, November 10, 2011
Bright Scraps
I wanted to post a picture of the other charity quilt that I completed. These are the lonely 9 patches that lived on my design wall for many years. They were there so long, they were invisible to me-just part of the wall. I ran out of black scraps so I couldn't put the sashing on all 4 sides. If anyone asks, it was part of the design. My DH picked the binding fabric. It will move on to Eleanor this afternoon for handstitching and a label. I used flannel leftovers for both backings to make them nice and soft. After backing 2 quilts, I still can't get the drawer shut.
Subscribe to:
Posts (Atom)